
Aircraft
Welcome to the Cessna Nav Trainer! This tutorial is setup for users of Microsoft's Flight Simulator, versions FS2002, fs9 or FSX. To be compatible with these flight simulators, as well as future versions, I chose the default Cessna 172 for the practice flights, however with modifications.
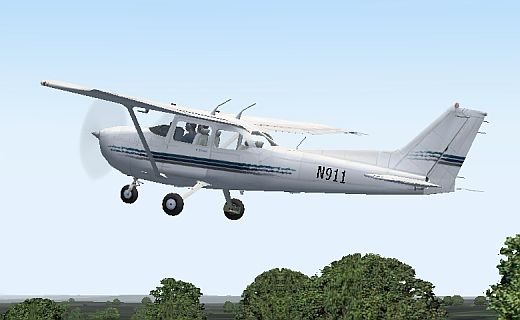
A new panel was the most significant change. Not only is this panel more suitable than the default for navigation training but it increases the view out that Cessna windshield by nearly fifty percent.
Plan on a 110 knot cruise speed for your Cessna Nav Trainer.
Most of the panel gauges already reside in your Gauge folder which greatly reduces the size of the file to download. In memory of the World Trade Center attack of 2001 in New York City, the Cessna Nav Trainer carries the registration number of N911.
How to install the Cessna Nav Trainer
Installing the Cessna Nav Trainer is simplicity itself. Here is how you do it:
-
First, download the main file, either from the links below, or from the download page. Please choose the correct version to match your Flight Simulator!
Download the FSX Cessna Nav Trainer
- Create a temporary folder with any name.
- Extract the files from the ZIP file that you just downloaded into the temporary folder ... There you will find a Readme.txt file. Open that file.
- Follow the Install instructions in the Readme file.
- That's all there is to it. You're finished!
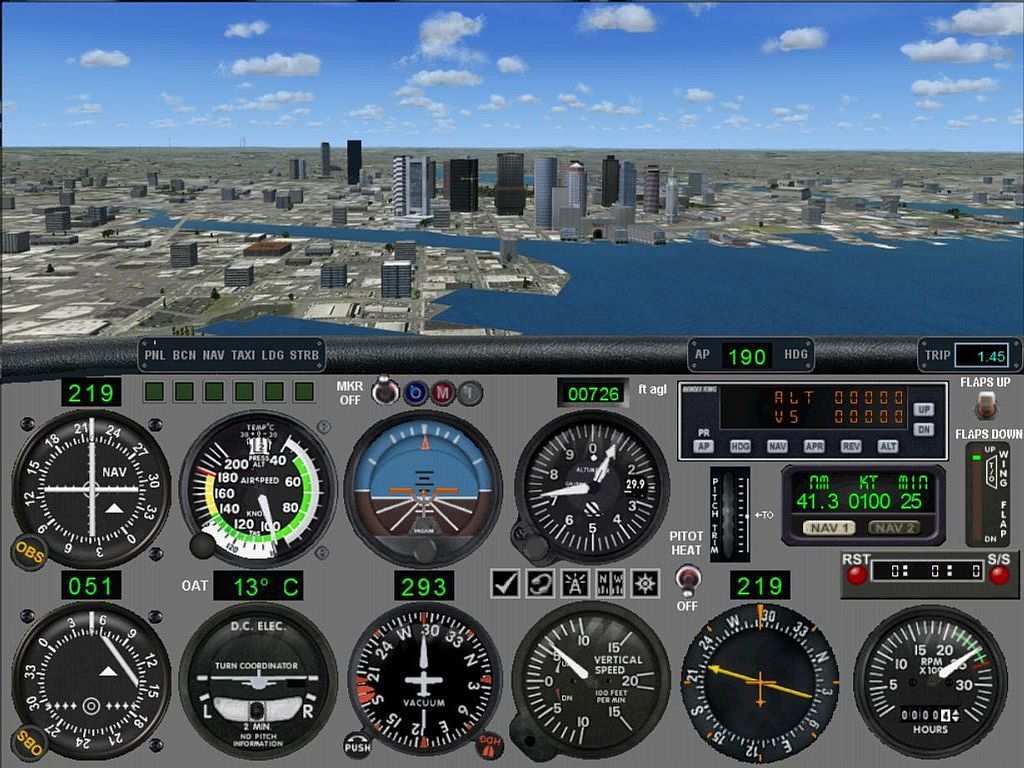
A few Notes about the Panel The first thing you'll notice once you climb into the cockpit of this trainer is the digital readouts. Standard aircraft instruments are 3.5 inches in diameter (about 9 cm) and because of their size, easy to read. However, unless you have a 32 inch monitor, these flight-sim gauges will be smaller than real life. I added the digital readouts to overcome that liability. Thanks to Ike Slack for creating them for us. Dave Bitzer, Norman Hancock and Daniel Collins created the FSX versions.
These are the various digital readouts:
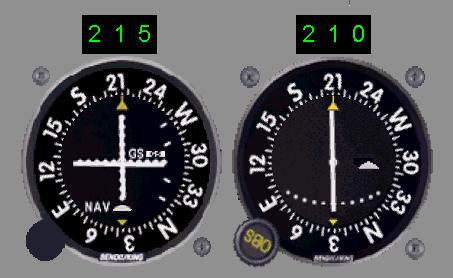
The digital readouts for the VORs display the OBS Settings. Here we are on an ILS Approach to Boston Logan's Runway 22L. VOR 1 is set to 215° as a reminder of the approach heading and VOR 2 is set to the radial to BOS VOR on the field.
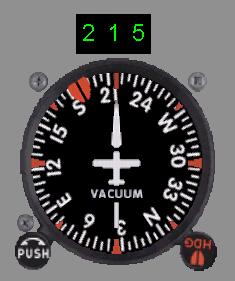
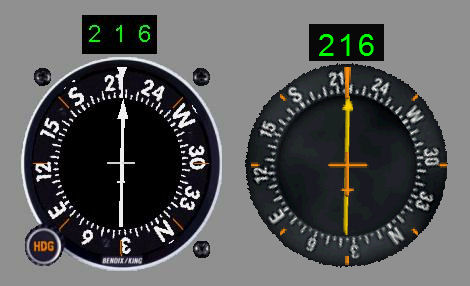
The digital readout for the Directional Gyro displays the Magnetic Heading of the aircraft. With no wind, our heading during the ILS Approach to Boston's Rwy 22L is 215°.
Here are the fs9 RMI (Left) and the FSX RMI (Right). The digital readout for the RMI, Radio Magnetic Indicator, displays the Magnetic Bearing to the NDB. Here the RMIs show that the Locater, Outer Marker, LOM, is still in front of us as we approach Boston's Rwy 22L.

Digital Timer ...
This Digital Timer is a great instrument and should be on every aircraft panel. No handbook is needed to learn how to use it or to figure out the meaning of the digits. The Start/Stop button is on the right side; the Reset button is to the left. It times flights up to 1:59:59; or 1 hour, 59 min; 59 seconds .... definitely past the time I will spend on a single flight. The 29 min., 49 sec., shown here was the time from New Bedford, Massachussetts to Fishers Island ... your first practice flight.

Tom Goodrick's Flight Timer ...
solves a problem that I have never completely overcome in my many years of flight-simming ... remembering to start or stop my flight-trip timer. Tom's timer does this automatically! Thank you, Tom. It starts when airspeed exceeds 35 kts indicated and stops when airspeed falls below that value. His timer is in a nice case but because of panel space limitations I changed that to a transparent image. This is an XML gauge designed for fs9 but works great on FSX, too.Note the reading here, 32.75. That is minutes and hundredths of a minute, or 32 minutes and 45 seconds.
Hidden Panels
Three "panels" are not normally visible. Here are the keystrokes to access those panels.
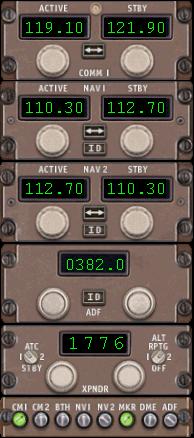 Radio Stack was the easiest decision for the Nav Trainer panel. The Bendix-King radios, with their Ugly Red Digits, would NOT be in it!
The FSX panel uses the Boeing 737 radios, while the FS2002 and fs9 panels use the Boeing 777 radios. These radios are easier to set and read than the Bendix-King units.
The Audio-Switch panel is at the bottom of the stack.
What's NOT on the Panel
This panel-aircraft combination was assembled solely to enhance learning the principles of Navigation. The basic model is the Cessna 172. It was not designed as a stand-in for other, more complete aircraft and panels. Of course, you may use this aircraft and panel to fly any flight you wish, but be forewarned that some common panel items are not included here that are on Microsoft's default Cessna 172 panel. Here's what I have left off of the Nav Trainer's panel.- Throttle and Mixture Controls
- Fuel Gauges
- Fuel Flow Gauge
- Fuel Tank Selector Switch
- Oil Temperature Gauge
- Oil Pressure Gauge
- EGT Gauge
- Ammeter
- Voltmeter
- Clock
Flying The Cessna Nav Trainer
The only method to achieve a high level of flying, is "flying by the numbers." Without consistency little success can be achieved. While flying, keep a chart near at hand that contains the important flight settings. Here's the chart that I use for the FS2002 Cessna Nav Trainer. Note that the power settings are only approximate and will vary with altitude, but they are a good place to begin.
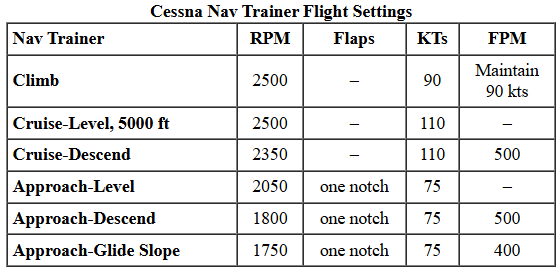
Click here to print the table. Note that your flight settings may vary slightly.
Now let's look at supplies. Click Supplies below to move on.
Site best viewed at 600 × 800 resolution or higher.
© 1999 – 2008, Charles Wood.