Before we start, let's define Level Flight Attitude. It is that attitude that maintains a constant altitude. It is not necessary a level attitude, i.e., with the nose on the horizon.
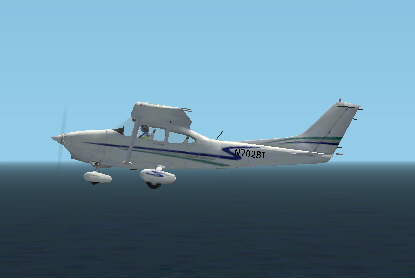
For the graphics, I borrowed the default Cessna in FS2002. What I'm going to describe, pertains to all airplanes.
 |
 |
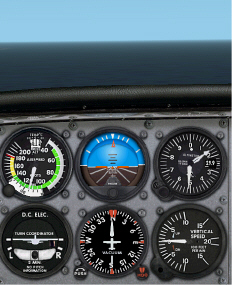
In the example above, we are in level flight at 1,500' (Altimeter) and 115 knots (Air Speed Indicator). Note the Vertical Velocity Indicator (VVI) reads zero. The Attitude Indicator (AI) shows the little red "airplane" on the artificial horizon. Now check the image, above right and we see that the nose is nearly on the horizon. Now we'll slow down ...
 |
 |
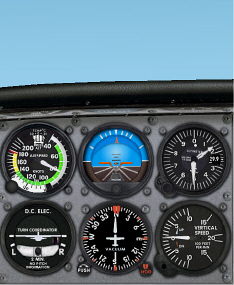
In this example above, we are in level flight at 1,500' (Altimeter) and 70 knots (Air Speed Indicator). Note the Vertical Velocity Indicator (VVI) still reads zero. The Attitude Indicator (AI) shows the red "airplane" about 5 or 6 degrees above the artificial horizon. Now check the image, above right and notice that the nose is well above the horizon.
In this Cessna and in real life, we can move the little red airplane. The knob at the bottom center of the AI will crank the red airplane up and down. In the 70-knot example, we could lower the red airplane indicator downward to the artificial horizon. Then it's easier to maintain Level Flight Attitude and consequently hold altitude. The DC-3 / R4D birds are not programmed with the adjustment knob. You'll have to remember the Level Flight Attitude "picture."
The opposite is also true. If you accelerate to a very high speed, Level Flight Attitude can be nose low.
Keep these facts in mind when you are attempting to hold a constant altitude. Maintaining an altitude may require a nose up or a nose down picture on the AI. There are also other clues you can use to hold a constant altitude flying VFR (Visual Flight Rules).
In the DC-3 / R4D, I use the magnetic compass as an alternative for the AI. Set up level flight and adjust your seat height to whatever you like to see out of the cockpit. Remember that SHIFT + ENTER raises the seat and SHIFT + BACKSPACE lowers the seat. You can set the default position (full down) by pressing either the SPACEBAR or CONTROL + SPACEBAR. The command varies from plane to plane. At night when I can't see what the view is doing, I hit both commands to set the view position to the default and then raise it two "notches" (SHIFT + ENTER, twice) -- that's the view I like the best for landing.
Now that you are in level flight and the seat is set, look outside to see where the real horizon hits the Whiskey Compass* (Magnetic Compass). Does it hit the top of the compass, the bottom, or somewhere in between? Where ever it hits, that's level flight attitude for you, at this time and this speed. Change speed, or seat height and the horizon will hit the Mag Compass at a different spot.
That's all well and good for straight flight, but what happens in a turn? As you roll into a turn, the horizon tilts. Let's say the real horizon was about an inch above the instrument shroud in level flight. Keep checking the view directly in front of you and keep the horizon the same distance above the shroud. That should give you a good level turn. Intermittently, check your actual instruments to verify the level turn.
* Origin of the term Whiskey Compass -- the compass card inside the Mag Compass is floating in a liquid. In the early days they used alcohol or an alcohol derivative to keep the fluid from freezing. I did a quick check on the net to verify this -- I found many references to the Whiskey Compass and how to use it, but nothing about where the name comes from.
Created July 13, 2002